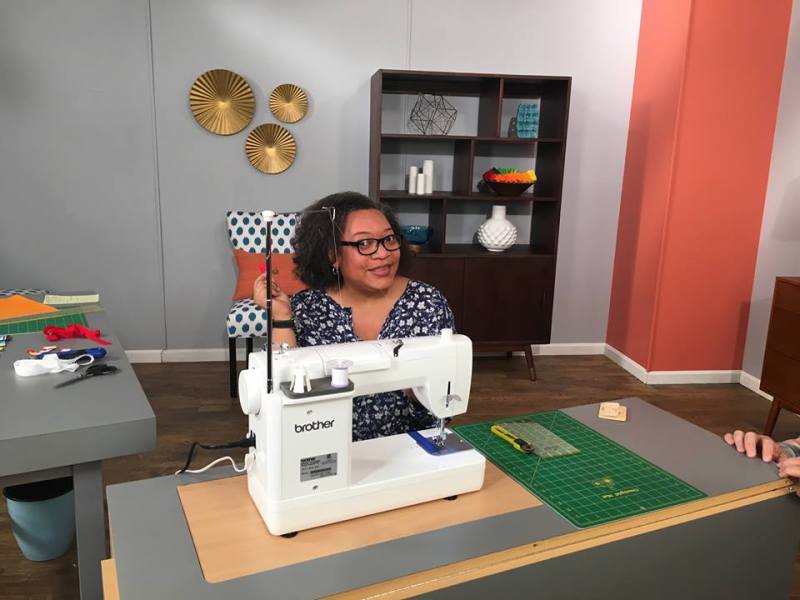
 Hey all, as promised, here is a primer on incorporating fabric weaving into your quilting, as demonstrated at Quiltfest by yours truly. I discovered fabric weaving, also known as triaxial weaving, mad weave, hex weave, and Japanese meshwork, several years ago and love teaching others how to use this clever and often time-saving technique to create a variety of designs. The technique originates from traditional Japanese fabric manipulation and traditional basket weaving, and while more commonly taught in areas closer to Asia – Australia, New Zealand, and the West Coast of the US, it began to pick up in popularity again here on the East coast in early 2012. As with all things quilting, what was old is always new again- this technique was popular in the US among quilters and sewists in the 1970’s. Note: Most of the samples in this tutorial use grosgrain ribbon – an excellent way to become familiar with the process before you cut into your much-loved fabrics. This technique can be used to make individual quilt blocks, panels for purses and clothing, or entire quilts.

What you’ll need: Prepared strips (see details on prep below), Foamcore/thick cardboard as large as your finished piece, Straight pins or thumbtacks, and a large safety pin or other make-do device for pulling fabric strips into place – early on in my weaving journey, my friend Tara started 3-D printing a tool specially designed to weave fabric strips, the amazing Wefty needle. She makes them in several different sizes and they make this whole process a dream! I highly recommend picking a few up if you find yourself intrigued with fabric weaving.
Strip Preparation: Prep your strips – it’s important to remember that you will need approximately 3 times as much fabric as you would for a traditional quilt since there are three layers to any woven design. For the tumbling blocks weave, you will need 1.25 times as much fabric as your final quilted area in EACH of your three weave colors. This is assuming you are cutting 2.5″ strips and running them through a 2.5″ bias tape maker, resulting in 2″ finished strips. I usually cut 2.5 strips on the grain of the fabric (jelly rolls work wonderfully for this), WOF, and starch and press on high heat as I run them through my bias tape maker, then starch and press on high heat. I cut my prepared strips to the right lenght, and piece the “leftovers” together – if you don’t want to fuss with this, you could cut all strips to the right length before preparing. Actually cutting strips on the bias is not recommended – you don’t want your strips to be too stretchy, as this can distort your weave. There are several other ways to make and finish strips, depending on the time you want to invest on the “front end” of your project and its ultimate use. We’ll save that for another tutorial though 🙂
1. For your first layer, you will be cutting strips the finished height of your piece, plus an extra inch to allow for adjustments. You will need enough strips to cover your entire base – how many strips you will use depend on the width of your strips and the width you want your finished piece to be.
2. Prepare your surface. You will need a surface large enough for your finished piece or block – my favorite easily accesible material is foam core board from craft stores. If you buy two trifold boards and connect them with duct tape you can create quite a large surface. For even bigger pieces, sheets of lightweight drywall from a home improvement store works wonderfully. You can adhere your strips with thumb tacks or straight pins, inserted into the foamcore at a 45 degree angle.
 3. Lay down your first layer. The sequence of colors you use in this first layer will dictate your final design – for this example, which creates a tumbling block design, you are going to use color 1 (solid blue) as your base. Make sure your strips are stretched tight and are lined up as straight and close together as possible. For any other fellow weavers out there, this is, in essence, your warp.
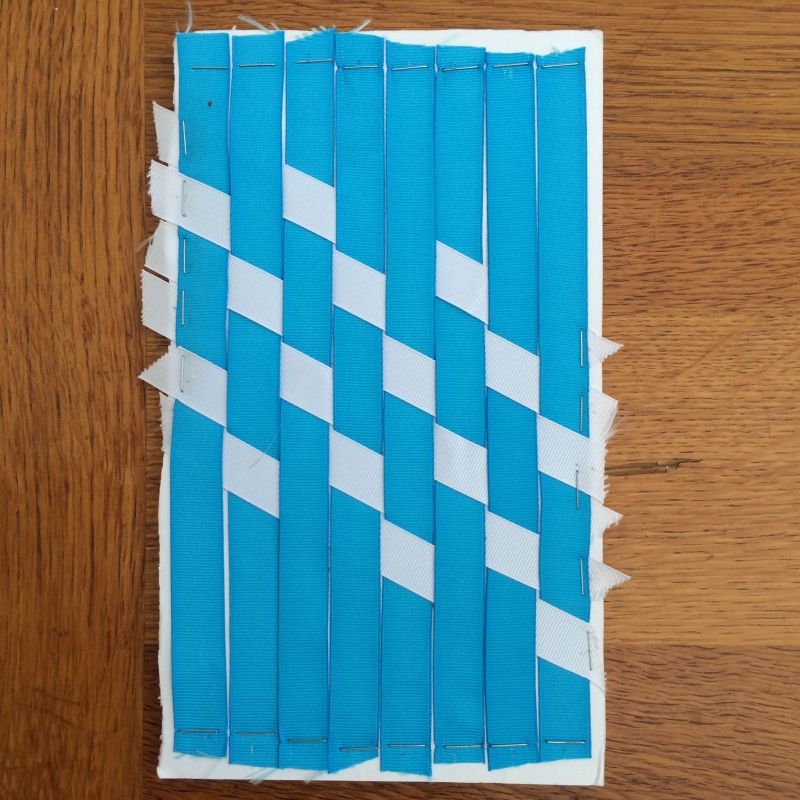 2. Next, use a ruler to mark a 45 degree angle across your entire piece from the upper left to the lower right side – I like to use painters tape for this, as you will only need it as a guide for the first few strips – after you have pinned your first couple in place, remove the tape and simply use the beginning of your second layer as a guide. Use your 45 degree line to place your first strip of color #2 (white in this example). Your pattern here is basically “two under one over” – that is, strip 1 will go under your first two blue strips, over your third, then under the next two. The next strip will use the same pattern, but shift over one space, so over the first blue strip, then under the next two. The third will be similarly shifted, this time under one, over one, under two. I know this can sound overwhelming, but zoom in on the example above, and remember, nothing is sewn down yet! My mantra when I do this weave is “under two, over one, under one” – the first step every strip in the sequence takes.
As you weave in each strip, make sure to anchor your starting end with a pin or thumbtack so you don’t just pull it out the other side. When you have completed your second layer, step back and look at your piece – you should have rows of diamonds in color 2 running from the top left corner to the bottom right. At this point, unpin and reweave any strips that were placed incorrectly. Once this is done, make sure all of your second layer strips are securely pinned down. At this point you may need to tighten up and straighten your first layer as well.
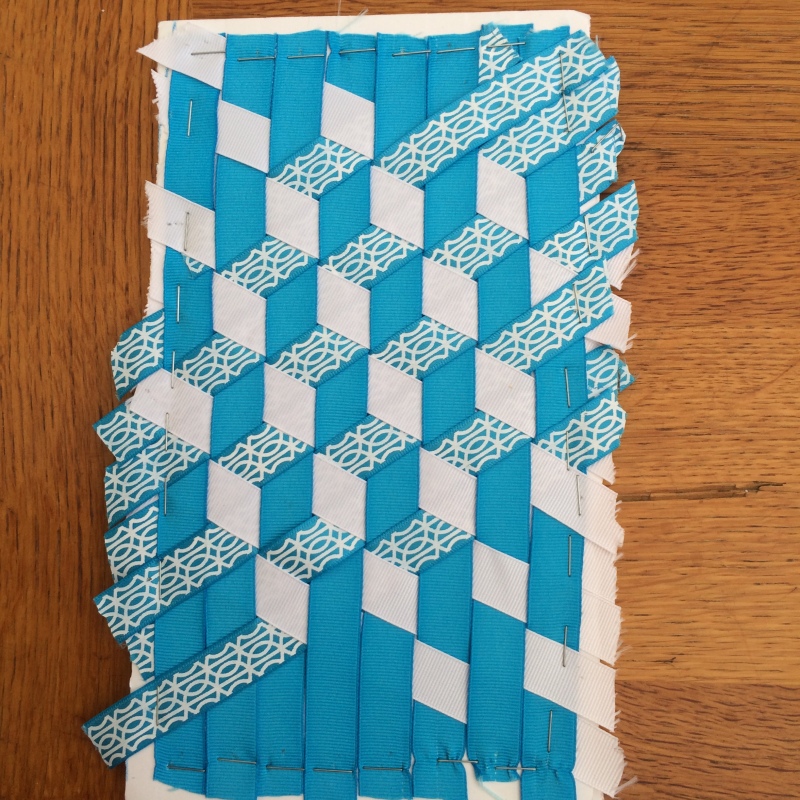 3. Just as in step 2, mark a 45 degree angle with painters tape, this time from upper right to lower left. You are going to repeat the same pattern, taking strips of color 3 (blue and white patterned ribbon) and running them over one, under two of your previous two layers, staggering your sequence as you did in step 2. Think about it in terms of just your first layer – you are still using an over one, under two pattern, but are also going under any overlaying strips from layer 2. A picture is worth well more then 1000 words in this case, zoom in and take it one strip at a time. This may take a few tries to do correctly – I still lose track of my pattern sometimes. Look for a pattern of color 1 diamonds emerging, moving from the top right corner to the bottom left this time. Once you have finished this layer, adjust and tighten as before. You may need to tighten and adjust color 1 or 2 strips as well – look for any slack and adjust as neccessary.
4. The last step – stabilizing – is a little nerve wracking, especially with a large weave, but just take your time and you’ll be fine. I like to put painters tape down over my whole weave as a precaution first. Then, I remove my pins, and gently slide my piece off the foam board. For extra security, you can take white school glue such as Elmers or Roxanne’s and place a dot at each intersection of the weave, then press to dry the glue. After securing my strips in place, I use my domestic machine to zigzap all four sides of my weave. At this point, if you are not going to baste the piece to batting and backing immediately, it can be stored taped or pinned against a hard flat surface such as cardboard or foamboard – I like to tape mine down to rigid cardboard and hang them on pants hangers till I am ready to use them, but they can certainly be stored flat as well (I have a few hidden under my bed) .
If your strips were simply ironed after running them through a bias tape maker, your quilt will need to be thoroughly quilted in the ditch of each “diamond” shape so that it does not distort or unravel in the washing machine. Other strip preparation methods will allow you to do less dense quilting – watch this site for more info on that.
Please leave any questions or comments below, and feel free to contact me with any weaving specific questions at my personal email, silverforgefarm (at) gmail (dot) com with any inquiries.
Resources – Many of the books on fabric weaving are out of print, but readily available used on Amazon. Also don’t be afraid to buy books that are not translated – the diagrams are really what matters in triaxial weaving designs, and most of them are quite easy to understand, even if the text is only in Japanese.


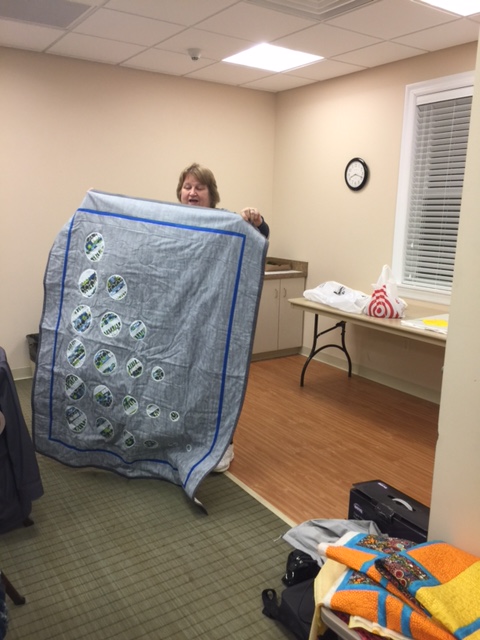
 At our last meeting, our own June Mellinger (


 Hey JSMQG! Looking to jump on the fabric challenge bandwagon? This looks like a fun one and it’s not due (digitally) till September 12, 2017, which means it would be an awesome summer project! You need to create a contemporary style quilt using only the bella solids in the picture above. All colors must be used somewhere on the quilt – this can be either the front or the pack though – any style of piecing, quilting, applique, or embellishment goes. Fat Quarter bundles are available from most of the major online fabric shops – I will see if Pennington is carrying them and update as I find out. Here are the colors you must use and the rules and relevant links:


